 Canada
  Brazil
  Germany
  France
  Italy
Italy  Switzerland
  Sweden
  Spain
Spain  Great Britain
  Norway
  Russia
  South Africa
  Japan
Japan  New Zealand
  Australia
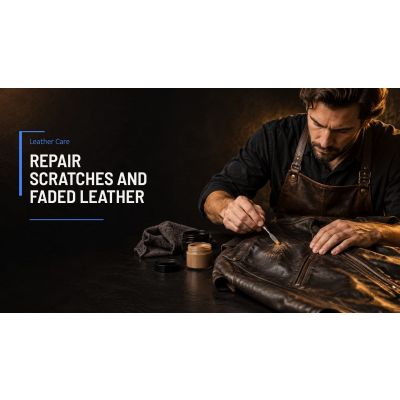
Scratches, fading and small cracks are common on leather garments, including the pieces in the range, and many minor problems can be handled at home. This guide explains how to identify the leather, treat each type of damage, and recognize when the repair needs a specialist.
Key Takeaways
- Identify the leather and its finish before choosing a repair product.
- Test every product on a hidden area first, and treat each material separately on multi-panel jackets.
- Minor scratches, light fading and small cracks suit home repair; deep tears and structural damage do not.
- Light, heat and damp cause much of the damage, so storage matters as much as repair.
Know Your Leather and Its Finish
Repair products behave differently on different leathers. Full-grain leather keeps the entire grain layer and develops a patina with use. Top-grain leather has the surface layer taken off a little, so it is thinner and more pliable. Split leather comes from the layer beneath the top grain, "genuine leather" often means a heavily processed split, and bonded leather is shredded scrap held together with polyurethane or latex. Bonded leather usually needs a dedicated repair kit (Wikipedia: leather).
The finish matters as much as the grade. An aniline finish lets the natural grain show, while a pigmented finish is a surface coating that gives a uniform color. Coated leather takes a colorant touch-up on the surface; leather with an aniline finish absorbs products more readily, so a hidden-area test is essential. Garments built from several materials, such as , need each panel checked separately.
Fixing Scratches
Minor surface scratches can sometimes be made less visible with a soft cloth. Test a small amount of the maker-recommended product on a hidden spot first; the right treatment depends on the finish.
For deeper scratches on your , use a leather repair kit that includes filler and colorant. Apply a thin layer of filler to the scratch, smooth it with a spatula and let it dry fully. Then blend the area with a matching colorant or leather dye. Build color in thin coats and let each dry, because one heavy coat is harder to blend.
Restoring Faded Leather
Leather fades with light exposure, cleaning chemicals and wear. Conservation guidance for museum and heritage collections from the Canadian Conservation Institute notes that dyes and paints fade with light and recommends limiting exposure to UV. To restore color, clean the surface first, apply a leather dye or color-restoring cream evenly with a sponge or cloth, and let it dry completely. Finish with a product suited to the leather finish, as recommended by the maker.
Repairing Cracks and Tears
Small cracks can be treated with a maker-recommended product or leather filler. Clean the area, work filler into the crack, smooth it and let it dry. Buff gently, then apply colorant if needed.
For a larger tear, use a patch from a leather repair kit. Cut the patch slightly larger than the tear, glue it underneath, then blend the surface with filler and colorant. Jackets with fur trim or lining need extra care: keep dye and filler away from the fur, and see for how those pieces are built.
Use Conditioner Sparingly
Conservation guidance written for museum objects cautions against dressings, noting that oils can oxidize over time and attract dust. For a worn garment, follow the care label or the maker's instructions, because the right product depends on finish and construction. Where a conditioner is advised, a thin layer with the excess wiped off is the usual approach, and leather that already feels oily or sticky should be left alone.
Preventive Care
- Keep leather out of direct sunlight, which fades dye.
- Store it away from radiators and other heat sources, and avoid damp or very dry rooms.
- Wipe spills straight away with a damp cloth, not a soaked one.
- Avoid harsh cleaners that strip natural oils.
When to Call a Professional
Home repair suits minor scratches, light fading and small cracks. Deep tears, damage along seams or structural areas, and severe discoloration are better handled by a leather restoration specialist, especially on a garment that matters to its owner. A repair that goes wrong is harder to undo than the original damage.
Frequently Asked Questions
Can scratches be removed from leather at home?
Light surface scratches can sometimes be made less visible with a soft cloth and a product the maker recommends for the finish. Deeper scratches need filler and a matching colorant from a leather repair kit, applied in thin layers. Test the products on a hidden spot first, and expect a repair to be less visible rather than invisible.
How do I fix faded leather?
Clean the surface, then apply a leather dye or color-restoring cream evenly with a sponge or cloth and let it dry completely. Finish with a product suited to the leather finish, as recommended by the maker. Fading comes mainly from light exposure, so keeping the garment out of direct sunlight afterwards helps the repair last.
How often should leather be conditioned?
There is no fixed schedule. Follow the care label or the maker's instructions, because the right product depends on finish and construction. Conservation guidance written for museum objects cautions that oils can oxidize and darken or stiffen leather over time, so over-conditioning can cause problems of its own; that guidance is not written for worn clothing.
When should leather be repaired by a professional?
Choose a specialist for deep tears, damage along load-bearing seams, severe discoloration and bonded leather that is peeling. These repairs involve rebuilding or replacing material instead of surface touch-ups, and a failed home attempt can make the final restoration harder.
Written by the Leather Collection Editorial Team.